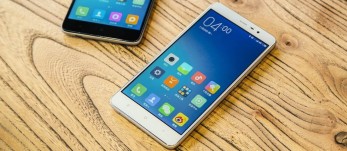
SpecificationsSamsung Galaxy Note 7 SpecsBattery4200 mAhCamera FeaturesOptical image stabilization plus, Dual LED, geo tagging, facial recognition, 3D front and back camera technology, auto laser focusCamera – Front9.0 MegapixelsCamera – Rear32 MegapixelsColorsBlack and WhiteFeaturesMetal uni-body design, fingerprint scanner, foldable, eye sensing technology, wireless charging, rapid charging plus, Corning Gorilla Glass 5Memory32, 64, 128 GB internal memory and expandable to more than 256 GB with dual micro SD card slotsOperating SystemAndroid 7.0 operating system preinstalledPrice$900 USD, 820 Euro – see belowProcessorSnapdragon Qualcomm Octa-core 3.3 GHz processorRAM6 GB RAMRelease DateSeptember 2017 – See BelowScreen Display6.1” 4K display with a 4096 x 2160 screen resolution
Translate
الجمعة، 3 يونيو 2016
Umi Iron Pro
Umi Iron Pro
Display
5.5″ 1080p (Full-HD)
Processor
Mediatek MT6753, 64-bit, octa-core (up to 1.3GHz)
RAM
3GB
Camera
8MP Front/13MP Back
Connectivity
Bluetooth, 3G, 4G, GPS, WIFI, GSM,EDGE, GPRS, UMTS, HSPA, HSPA+, dual-SIM.
Battery
3.100 – 3.300 mAh (non-removable)
Dimensions
152.3 x 76.5 x 7.9 mm / 148g
OS
Android 5.1
Storage
16GB (expandable via microSD card slot up 128GB)
Xiaomi Mi Max
NETWORKTechnologyGSM / CDMA / HSPA / EVDO / LTELAUNCHAnnounced2016, MayStatusAvailable. Released 2016, MayBODYDimensions173.1 x 88.3 x 7.5 mm (6.81 x 3.48 x 0.30 in)Weight203g (7.16 oz)SIMDual SIM (Nano-SIM/ Micro-SIM, dual stand-by)DISPLAYTypeIPS LCD capacitive touchscreen, 16M colorsSize6.44 inches (~74.8% screen-to-body ratio)Resolution1080 x 1920 pixels (~342 ppi pixel density)MultitouchYesProtectionCorning Gorilla Glass 4 - MIUI 7PLATFORMOSAndroid OS, v6.0 (Marshmallow)ChipsetQualcomm MSM8956 Snapdragon 650
Qualcomm MSM8976 Snapdragon 652CPUQuad-core 1.4 GHz Cortex-A53 & Dual-core 1.8 GHz Cortex-A72
Quad-core 1.4 GHz Cortex-A53 & Quad-core 1.8 GHz Cortex-A72GPUAdreno 510MEMORYCard slotmicroSD, up to 200 GB (uses SIM 1 slot)Internal32/64 GB, 3 GB RAM or 128GB, 4 GB RAMCAMERAPrimary16 MP, phase detection autofocus, dual-LED (dual tone) flashFeaturesGeo-tagging, touch focus, face detection, panorama, HDRVideo2160p@30fps, 1080p@30fps, 720p@120fpsSecondary5 MPSOUNDAlert typesVibration; MP3, WAV ringtonesLoudspeakerYes3.5mm jackYesCOMMSWLANWi-Fi 802.11 a/b/g/n/ac, dual-band, Wi-Fi Direct, DLNA, hotspotBluetoothv4.2, A2DP, LEGPSYes, with A-GPS, GLONASS, BDSNFCYesInfrared portYesRadioFM radio, recordingUSBmicroUSB v2.0, USB HostFEATURESSensorsFingerprint, accelerometer, gyro, proximity, compassMessagingSMS(threaded view), MMS, Email, Push Mail, IMBrowserHTML5JavaNo - Active noise cancellation with dedicated mic
- MP4/DivX/XviD/WMV/H.265 player
- MP3/WAV/eAAC+/FLAC player
- Photo/video editor
- Document viewerBATTERY Non-removable Li-Ion 4850 mAh battery
How to win $ 200 dollars in less than a minute
You could win $ 200 dollars if you are visitor number 1000 he tried to enter If the page to page every day
$$$page $$$
I phone 7 plus
Photos leaked showing the most important two advantages in Yvonne 7 Plus
14 hours ago
Leaked image spread by a period of time gave us the first real form of Yvonne Phone 7 look, which is very similar to a phone Yvonne 6 extent and in the light of the recent rumors, it seems very logical.
In 2015, Apple users paid about expensive versions expensive than Yvonne by increasing the storage capacity at a rate four times higher than the cheapest version of the iPhone, but this year Apple decided to increase the storage capacity of the cheapest version of Yvonne to 32 GB, which may be enough for many users, so the question remains is how Apple will be able to push users to more expensive versions?
There is no doubt that the iPhone 7 will be thinner and faster than Yvonne 6 S with the best components and advanced camera more, but Yvonne 7 Plus on the other hand it seems that it will enjoy the benefits we have not seen before on Yvonne than people would pay to pay more to get them, we had read all the rumors but the new images show exactly what holds us this phone, such as bilateral camera along with Smart Connector located near the bottom of the phone, which allows users to connect devices receive power and data from the device.
You will see several images at the bottom and shared by 9to5Mac site without giving the source of the images.
redmi note 3
The Redmi Note 3 is a thoughtfully targeted device with a premium metal build, flagship-grade specs, and an iconic MIUI launcher. The third device of the series upgrades design of the Redmi Note 2 just three months after its premiere, while keeping the same specs, but improving the security with a fingerprint scanner.
Indeed the upgrades are not that many - a metal shell, a bigger battery, new dual-LED flash, and biometric security. But are those enough to justify a new device?
Xiaomi Redmi Note 2 hit the shelves in August 2015 and the dust from this launch didn't even had a chance of settling before the Redmi Note 3 got official.
It's an unexpected product strategy and we have no possible explanation other than the possibility that the two phones will be offered on different markets altogether.
Or perhaps we should be looking at the Redmi Note 3 as the Pro version of the Redmi Note 2 (or Prime as Xiaomi calls those) - it costs a few bucks more and improves on the usability. The metal shell boosts the aesthetics and handling, the fingerprint reader unlocks the screen faster than a PIN number, while the dual-LED dual-tone flash may help for a better white balance when taking flash photos. And there is the bigger battery to keep the phone running for longer.
The 5.5" 1080p screen seems as great as before, the snappy Helio X10 chip is promising a flagship-grade performance, while the 13MP camera seems adequately equipped. The MIUI 7 comes out of the box and we know it will deliver a smooth and unique experience.
Key features
5.5" IPS display of 1080p resolution; 403ppi
Mediatek Helio X10 chipset MT6795; octa-core 2.0GHz Cortex-A53; PowerVR G6200 GPU; 2GB (16GB model) or 3GB (32GB model) of RAM
13MP main camera with hybrid phase detect autofocus, dual-LED dual-tone flash
1080p video capture at 30fps
5MP front-facing camera, 1080p at 30fps video recording
MIUI v.7 based on Android 5.0.2 Lollipop
16GB or 32GB of built-in storage
4G LTE Cat.4 (150Mbps); Dual SIM; Wi-Fi a/b/g/n/ac; Bluetooth 4.1; GPS, GLONASS and Beidou; FM radio
IR port
Dual-microphone active noise canceling
4,000 mAh non-removable battery, fast charging
الخميس، 2 يونيو 2016
Vr box 2.0
VR Box 2.0 – QR code and vague review
Before christmas I bought myself a smartphone VR viewer (a la Google Cardboard, just fabricated out of plastic instead of cardboard). I spent ages pondering whether I should buy one or not, since I didn’t actually NEED one, and it would just open up a world of new projects that I don’t have time for. In the end I did it, because the $30 or so that it cost would be offset by not being drawn to eBay and Aliexpress all weekend trying to find the best deal and then talking myself out of it. I bought the VR Box 2.0:
The reasons I picked this unit were fairly simple:
No particularly bad reviews
Adjustable lens position for both pupillary distance (distance between the centre of your eyes) and focus (distance from lens to eye)
Low cost
Moderate specs, enough for my purposes
Sliding panel for exposing camera
Openings for power and headphones
Overall it functions, and you can get a reasonably good VR experience. Some people will complain about the cheaper VR sets not having an immersive enough experience, but I don’t think that a few degrees extra Field Of Vision will really fix that.
Yes, the headset can get a little heavy on the nose, but that’s nothing that can’t be fixed by adjusting the straps or adding a little extra padding.
This headset doesn’t have the built in magnet switch for interactive with applications, so I made up a little dongle with a small rare earth magnet inside. When I bought the headset, it also came with a miniature bluetooth gamepad, and while many apps don’t accept gamepad inputs (for some bizarre and stupid reason), quite a few do.
In fact, the main issue I had with this purchase was dealing with the seller on Aliexpress. See, when the VR Box 2.0 arrived in the mail, I had a look at the sparse documentation, and it didn’t have a QR code for calibrating the Google Cardboard apps to the headset. There was a shrunk down image of a QR code in the pamphlet (which in itself looked like it had been photocopied onto glossy paper, so the image was blurry), but it wasn’t readable by the phone. Naturally I contacted the seller, asking if they could send me a copy of the QR code required. After a several responses along the lines of “the QR code is in the documentation” (which is wasn’t), and “please see the manufacturer’s website” (which could not be found, nor would the seller give me the URL), I told them that I’d have to leave a negative feedback if they didn’t help. They didn’t, so I did.
In the end, I used the Google Cardboard QR Generator: https://www.google.com/get/cardboard/viewerprofilegenerator/
I use a Samsung Galaxy Note 4 (which has a 145mm screen), and set up the QR code to suit my lens position, so your inputs relating to screen and lens position might be a little different, but the rest should be okay. Here are the values I used:
Primary button type: Magnet
Screen to lens distance: 44 mm
inter-lens distance: 61 mm
Screen vertical alignment: Centre
Distortion coefficients – k1: 0.1
Distortion coefficients – k2: 0.02
Field of View angles: all 50°
Note: if setting up your own QR code for this or another viewer, the fiddliest bit is getting the distortion coefficients set up correctly. These coefficients determine the adjustments for distortion, and need to be set up to ensure that vertical and horizontal lines stay straight, and don’t curve in or out at the edge of the screen. There isn’t a written description of these coefficient, but if you increase/decrease the values significantly you’ll see what they do in the little diagram on the right. k1 I believe sets the distortion for the 2nd power, and k2 sets the distortion coefficient for the 3rd power. For you, this means that if you look at the vertical lines in the VR grid preview (while setting up the QR code parameters), and they are curving in or out, adjust the k1 input until they look pretty straight, particularly in the centre 2/3 of the screen. Then, if the lines are still distorted near the edge of the viewing field, adjust the k2 coefficient in the same direction. If the ends of the lines have distorted too far, just take k2 back the opposite direction instead.